How to Roll Roti Properly Using Chakla and Belan
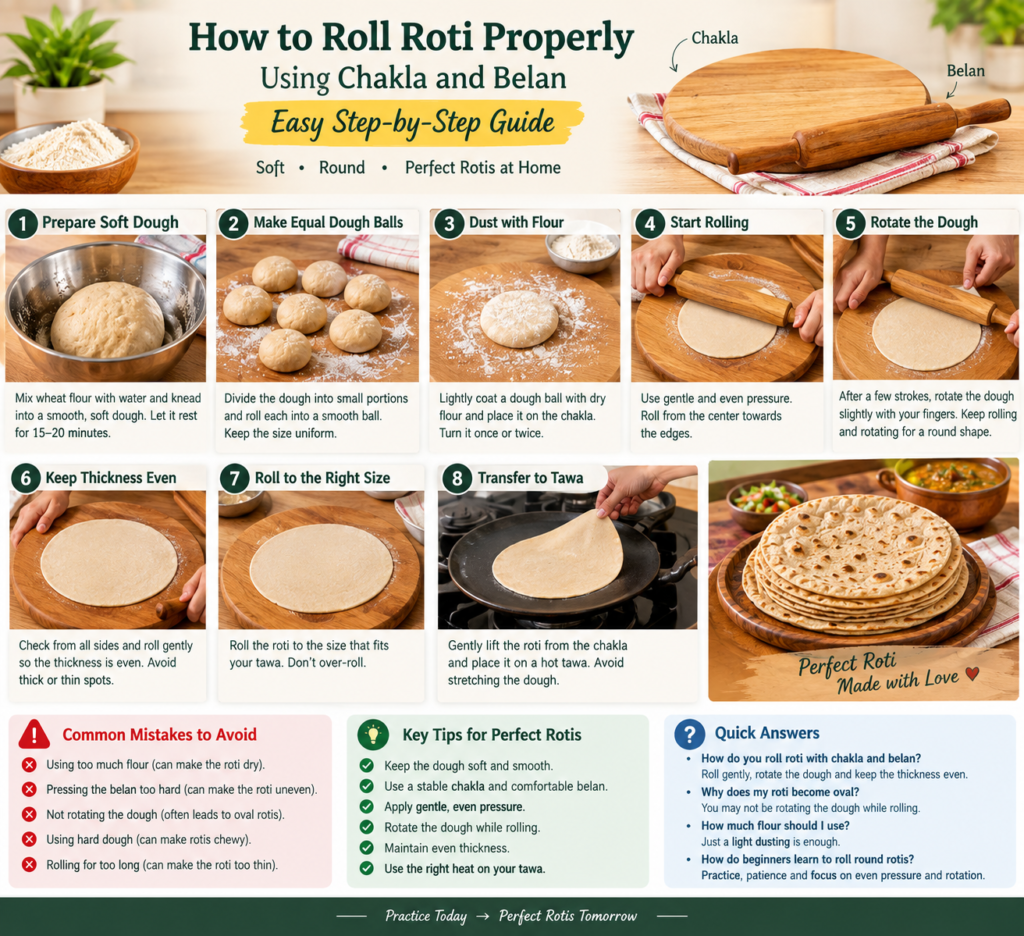
Making a perfectly round, soft roti can seem difficult when you are just starting out. However, with the right technique and a little practice, you can learn how to roll roti properly using a chakla and belan at home.
The traditional chakla and belan https://nlsenterprises.in/shop/ provide a stable surface and good control while rolling dough. The key is not simply pressing the belan harder but using even pressure, rotating the dough and maintaining the right dough consistency. A suitable chakla should remain stable while you roll, while the belan should feel comfortable in your hands.
Follow these simple steps to make evenly rolled, round rotis every time.
What Are Chakla and Belan?
A chakla is a flat rolling board used for flattening and shaping dough. A belan is the traditional Indian rolling pin used with the chakla.
Together, they are commonly used to prepare roti, chapati, paratha and puri. The dough is placed on the chakla and rolled outward with the belan until it reaches the desired size and thickness.
For comfortable rolling, make sure your chakla sits firmly on the kitchen counter and does not slide.
Step 1: Prepare Soft and Smooth Dough
Before you start rolling, your dough needs to have the right consistency.
Add wheat flour to a mixing bowl and gradually add water while kneading. The dough should become smooth and soft without being excessively sticky.
If the dough is too hard, it can be difficult to roll and may produce tough rotis. If it is too sticky, it can stick to the chakla and belan.
Allowing the dough to rest before rolling can also make the process easier. Different types of atta absorb water differently, so adjust the amount of water according to your flour.
Step 2: Make Even Dough Balls
Divide the prepared dough into small, equal portions and roll each portion between your palms to make a smooth ball.
Try to avoid cracks on the surface of the dough ball. A smooth dough ball is easier to flatten and roll evenly.
Lightly flatten one dough ball between your palms before placing it on the chakla.
Step 3: Dust the Dough With Flour
Take a small amount of dry wheat flour and lightly coat the flattened dough.
Place it on the chakla and turn it once or twice so that the surface does not stick.
Avoid using too much dry flour. Excess flour can fall onto the tawa and burn during cooking.
Step 4: Start Rolling With the Belan
Place the belan over the center of the dough and gently roll it forward and backward.
Do not press down too hard.
The goal is to apply gentle and even pressure so the dough becomes thinner gradually. Start from the center and work toward the edges.
If one side becomes thicker, adjust your rolling direction rather than repeatedly pressing the same spot.
Step 5: Rotate the Roti as You Roll
This is one of the most important techniques for making a round roti.
After every few strokes of the belan, rotate the dough slightly with your fingers. Continue rolling and rotating it.
This helps distribute pressure around the dough and gradually creates a circular shape.
If your roti becomes oval, do not worry. Simply identify the thicker areas and roll gently in those directions.
Perfectly shaped rotis usually come with regular practice rather than one special trick.
Step 6: Keep the Thickness Even
A round shape is useful, but even thickness is even more important.
An extremely thin section can cook faster and become dry, while a thick section may remain undercooked.
As you roll, check the surface from different angles. If one section looks noticeably thicker, give that area a few gentle strokes with the belan.
Try to create a smooth, evenly rolled disc rather than focusing only on making it perfectly circular.
Step 7: Roll to the Right Size
The ideal roti size depends on your preference and the size of your tawa.
As a general guide, roll the dough into a thin disc that comfortably fits your cooking surface without hanging over the edges.
Do not keep rolling after reaching the desired thickness. Excessive rolling can make the dough too thin and difficult to handle.
Step 8: Transfer the Roti to the Tawa
Once the roti is rolled, gently lift it from the chakla and place it on a properly heated tawa.
Avoid stretching the dough while transferring it.
A hot tawa helps the roti begin cooking quickly. Heat management is important throughout the process because an unsuitable temperature can affect the texture and cooking time.
Common Roti-Rolling Mistakes to Avoid
If your rotis are not turning out perfectly, check these common mistakes:
Using too much flour: Excess flour can make the surface dry and burn on the tawa.
Pressing the belan too hard: Heavy pressure can make the roti uneven and difficult to shape.
Not rotating the dough: Rolling in only one direction often produces oval or irregular rotis.
Using hard dough: Stiff dough is harder to roll and can result in chewy rotis.
Rolling for too long: Once the roti has reached the desired size and thickness, stop rolling.
How Do You Make Round Rotis Every Time?
The easiest method is roll, rotate, check and repeat.
Start with a smooth dough ball, apply light flour, roll gently from the center and rotate the dough regularly. Focus on even thickness instead of trying to force the dough into a perfect circle.
With consistent practice, your hand movement becomes more natural and your rotis will become more uniform.
Final Thoughts
Learning how to roll roti properly using chakla and belan is mainly about technique and practice. Keep your dough soft, use a stable chakla, hold the belan comfortably and apply gentle, even pressure.
Most importantly, remember to rotate the dough as you roll. This simple movement helps distribute pressure and makes it easier to achieve a round, evenly rolled roti.
Whether you are preparing everyday Indian chapati, roti or paratha, mastering the chakla and belan can make homemade flatbreads much easier and more enjoyable.